Tips for a Smooth Hardwood Floor Installation
Key Takeaways
- Proper preparation of the subfloor is crucial for a stable installation.
- Acclimating hardwood planks to your home’s environment prevents future issues.
- Choosing the correct installation method depends on your subfloor and skill level.
- Maintaining expansion gaps allows for the natural expansion and contraction of wood.
- Regular maintenance extends the life and appearance of your hardwood floors.
Enhancing your home’s value and aesthetic appeal with hardwood floors is a rewarding renovation choice. However, achieving professional-grade results requires thoughtful planning and the right expertise from the outset. For those unsure about tackling an installation themselves, turning to expert hardwood floor installation services in Tulsa is a smart way to ensure every step runs smoothly and your finished project stands the test of time.
From prepping the subfloor to regular maintenance after installation, every stage plays a vital role in achieving a beautiful finish. Rushing the process or skipping key steps can lead to issues like squeaks, uneven surfaces, or warping over time. Careful execution and attention to detail help homeowners avoid common pitfalls while maximizing the longevity of their hardwood floors. Mastering hardwood floor installation begins with acclimating the wood, selecting the appropriate installation method, and allowing for proper expansion gaps. Using quality tools and planning your plank layout enhances results, providing confidence whether tackling a single room or a whole-home project. Expert guidance can simplify each step and help achieve a polished, professional finish.
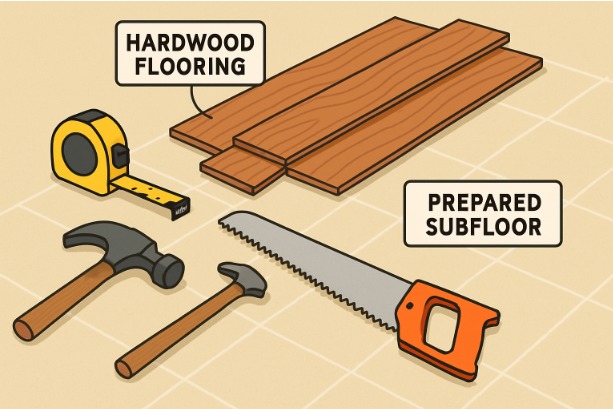
Prepare the Subfloor
The subfloor serves as the foundation for your hardwood flooring, providing a stable and even base for installation. Before you begin, thoroughly clean the surface, remove any old adhesive, and inspect for signs of moisture. Use a moisture meter to check wooden subfloors or apply a moisture barrier on top of concrete to prevent future water damage. Level any high or low spots to ensure a flawless finished surface, as even minor imperfections can cause future problems, such as squeaking or planks that don’t sit evenly. Ensuring your subfloor is sound and debris-free sets the stage for a professional installation and is recommended by many industry experts, as highlighted by This Old House.
A properly prepared subfloor not only extends the life of your hardwood flooring but also enhances its overall appearance. Taking the time to address these details upfront can save you from costly repairs and maintenance down the line
Acclimate the Hardwood
Hardwood, being a natural material, reacts to environmental conditions such as humidity and temperature. To prevent future warping, cupping, or gapping, let your planks rest inside the installation area for at least 72 hours. This period allows the wood to adjust to the room’s climate and helps ensure a snug, stable fit once the flooring is installed. Stack the boxes flat and spaced apart, and keep the space at normal living conditions during this period.
Choose the Right Installation Method
The method you select has a significant influence on your installation’s durability and success:
- Nail-Down: Best for solid hardwood installed over wooden subfloors. This traditional approach offers exceptional stability. Each plank is secured in place with specialized flooring nails, which require carpentry skills and precise measurement.
- Glue-Down: Ideal when installing engineered hardwood over concrete. This method provides a firm bond and soundproofing benefits, but requires attention to adhesive application and cleanup.
- Floating: Common for engineered hardwood, interlocking planks are laid above the subfloor without the use of permanent fasteners. It’s DIY-friendly and allows the flooring to expand and contract naturally, making it a popular choice for a broad range of spaces.
Evaluate your subfloor type and comfort level with tools before committing to an installation method, referencing authoritative advice from sources like Angi when in doubt. Proper preparation and method selection can prevent costly mistakes and ensure your hardwood floor lasts for decades. Taking the time to understand each technique will give you confidence and a smoother installation experience.
Maintain Expansion Gaps
Wood flooring naturally expands and contracts with seasonal humidity changes. Failing to leave adequate expansion gaps—typically around 1/4-inch along room edges—can cause boards to press together and buckle as the wood expands. Use spacers along each wall while installing and conceal gaps later with baseboards or molding. Adhering to manufacturer gap recommendations helps preserve both the aesthetics and structural integrity of your new floors.
Plan the Layout
A well-thought-out layout enhances both visual appeal and structural strength. Most homeowners find that running planks parallel to the longest wall makes the room feel larger and more inviting. Dry-fit your first few rows to fine-tune the pattern and minimize minor cuts at the edges. Additionally, stagger each row’s end joints by at least six inches to promote strength and a more natural appearance.
Use Proper Tools and Techniques
Having high-quality tools on hand, such as a flooring nailer, a saw for custom cuts, a tape measure, and a chalk line, can make the installation process smoother and more precise. Always refer to the manufacturer’s instructions for details on fastener spacing, adhesive type, or floating process. Small details such as tapping blocks and pull bars help achieve a tight fit between boards without risking surface damage.
Regular Maintenance
Preserving the beauty of hardwood requires simple but consistent care. Sweep or vacuum regularly to remove abrasive grit that can scratch finishes. For deeper cleaning, use a damp mop and a cleaner formulated for hardwood—not water or harsh chemicals. Quickly wipe up spills and add protective felt pads to the legs of furniture. With proper upkeep, your floors will retain their luster for generations.
Seek Professional Help if Needed
If you’re uncertain about any aspect of the installation process—especially with subfloors, layout planning, or the technicalities of different installation methods—consult a professional to avoid costly mistakes. Relying on an experienced installer guarantees the best possible outcome, saves time, and protects your flooring investment.
Transforming your home with hardwood floors is a project that pays dividends in enjoyment, style, and property value. By following these expert-recommended steps, you can achieve a smooth, long-lasting installation that brings new life to your living spaces.
Conclusion
Installing hardwood flooring is a multi-step process that combines careful preparation, informed method selection, and ongoing maintenance to achieve lasting beauty and functionality. From prepping the subfloor and acclimating the wood to planning the layout, maintaining expansion gaps, and using the right tools, each detail contributes to a flawless result. While DIY installation can be rewarding, professional expertise ensures precision and durability, safeguarding your investment. By following these best practices, homeowners can enjoy hardwood floors that not only elevate the aesthetic appeal of their space but also provide long-term value and satisfaction.

Samar
Punsuniverse — a realm crafted by me, Samar! You will find everything here that is related to puns, weather its food, animals, names or something elsse.